
This cake just might be the best dessert recipe on the blog. There, I said it. I know you’re not supposed to pick favorites, but this recipe that will make you break all of the rules. It’s a rich layer of moist, dark chocolate espresso cake topped with a creamy brown butter frosting that is reminiscent of salted caramel.
It is worth every calorie.
The best part? It is a single layer cake that requires no fuss with the decorating. All you have to do is slather a sheet cake with a thick layer of the best frosting you’ve ever had. If you’ve never had brown butter frosting, your life is about to change!
I first had it when I made Female Foodies’s olive oil cake with brown butter frosting. I just knew it would be even better on this chocolate espresso cake. The result is a cake that even my husband, whose favorite flavor is vanilla, could not stop eating it.
Chocolate Espresso Cake with Brown Butter Frosting Recipe Walkthrough
While there are a few “special” steps, like brewing espresso and browning butter, this recipe is relatively easy to make. As a matter of fact, I made this cake only one layer to prevent any extra work when it comes to assembly and decorating. You’re welcome!
You’ll find several iterations of this cake on the blog, like our Disney copycat cupcakes or our chocolate poke cake. It’s a tried and true recipe and the perfect base for our brown butter frosting, except this version uses espresso shots instead of plain black coffee.
Just like in our espresso brownies, espresso buttercream, and espresso cupcakes, we used our Breville Barista Express Impress to brew three double shots of espresso. The result is a more decadent and full coffee flavor that lends to a more intense and layered experience. Definitely worth the extra step, in our opinion.
Once you’ve browned your butter, the frosting portion is just a classic buttercream recipe. It’s just butter, that’s been browned, with powdered sugar, vanilla, salt, and heavy cream, you can’t get any more classic than that!
Making the Cake
My number one recommendation when making this cake would be to organize your preparation. The most helpful thing that I have learned since I started baking, is to prep my ingredients as they are grouped in the recipe before I officially “get started.”
This helps me to carefully measure out each ingredient and ensure that the ingredients are added and mixed in at the right time. As you can see in the photo below, I have prepped and organized my ingredients in separate bowls to streamline as much as I can.
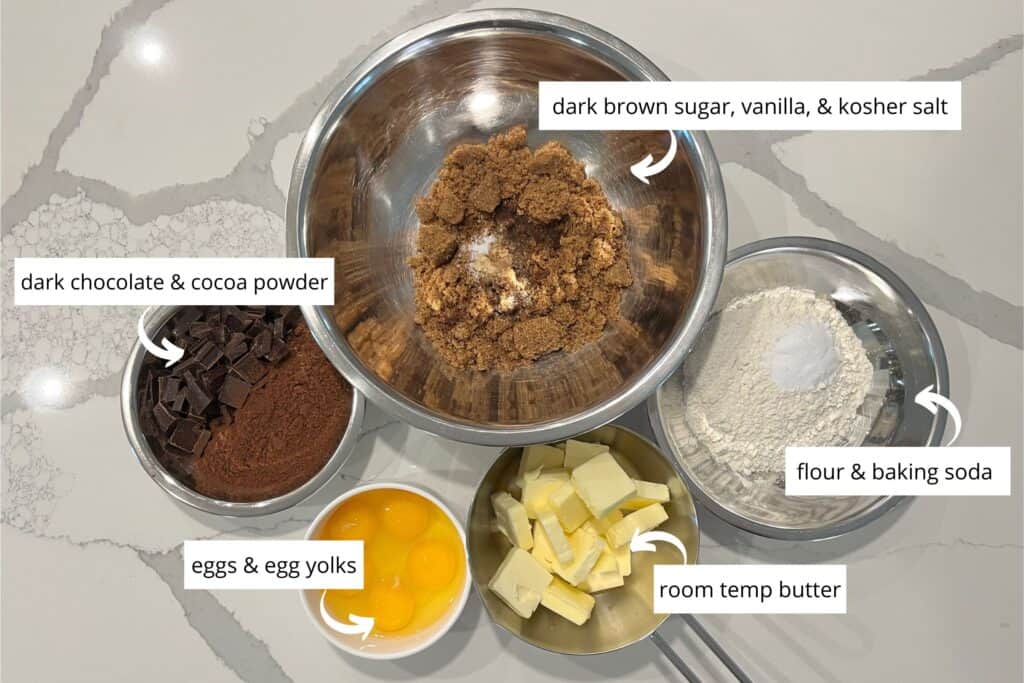
While this can add a few extra dishes to your workload, it is massively helpful for your mental workload as you juggle getting everything together for your bake. There’s a reason that ingredients are pre-measured out when you watch any kind of cooking or baking video! It makes your life so much easier.
Browning the Butter
Browning your butter elevates the flavor profile of your bake so much. The importance of this step cannot be overstated. I mean, this is what makes this buttercream frosting!
The thing about browning butter is that it goes from nothing happening, to everything happening all at once. It can quickly go from simply melted butter to burnt butter. There are several cues to look out for during the process that will ensure that you get the perfect browned butter every time.
So, I will show you how to do just that with some visual aides and helpful notes down below. I have another method that you might find helpful in my brown butter chocolate chip cookies recipe too.
Step 1: Melt the butter.
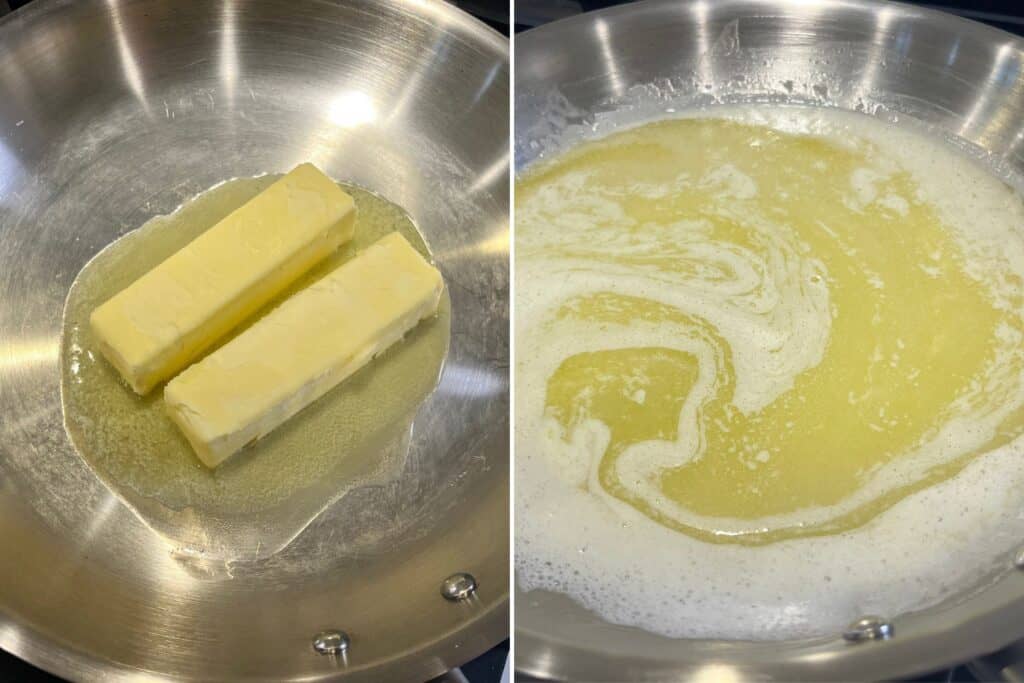
In a large saucepan or skillet, melt the two sticks of butter over low to medium heat. Be sure to constantly stir the melting butter to keep everything moving and cooking evenly.
Step 2: Stir the butter until it starts to brown.
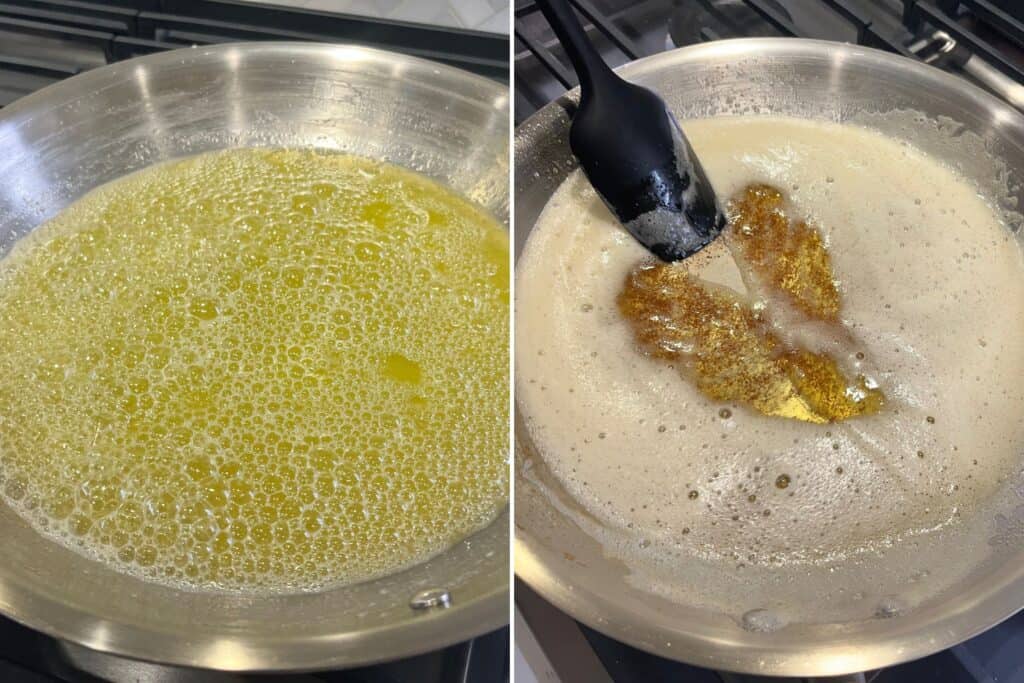
The first noticeable cue you will encounter after a few minutes, is the butter will starting to bubble. This is the liquid being cooked off and releasing. As the moisture is cooked off, the bubbles will become smaller until there is a layer of foam on top.
The butter will start browning very quickly once this layer of foam appears, so be prepared to remove the pan from the heat immediately. Once you start seeing the brown particles at the bottom of the pan, underneath the foam, you have only a few seconds before the particles become burnt.
When you see the brown particles throughout the butter, remove the butter from the heat. Transfer to another bowl to cool completely.
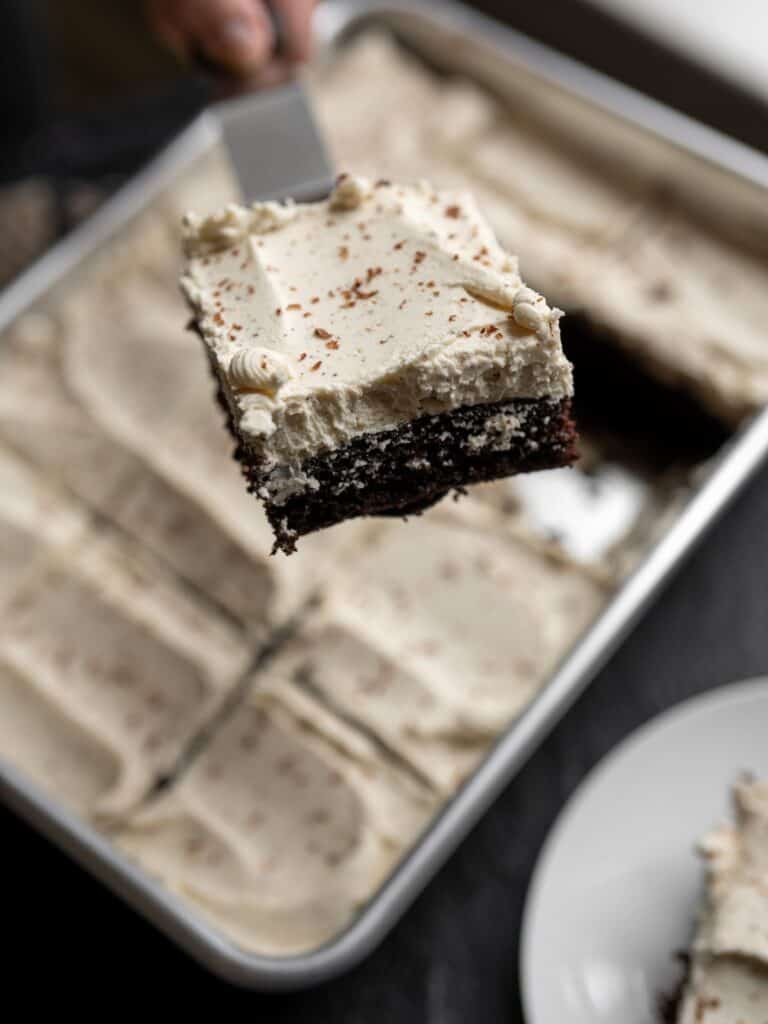
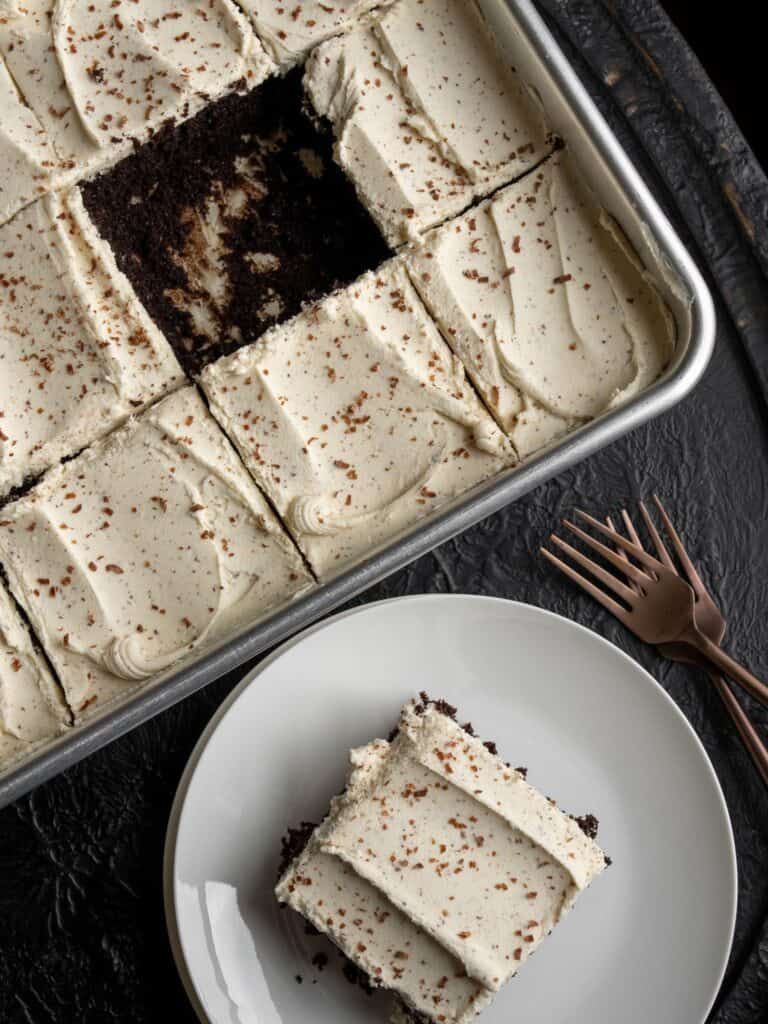
Once your cake is cooled, spread a nice, thick layer of brown butter buttercream frosting evenly across it. You can add some dark chocolate shavings on top for a more elevated look, if you like. Other than that, this baby is ready to eat!
If you’re not in the mood for frosting, be sure to try a generous dollop of our espresso whipped cream instead! It’s another great alternative for this delicious cake.
I hope you enjoy this recipe as much as we do. Let us know what you think down in the comments below! We love to hear your feedback. What should we make with brown butter next?
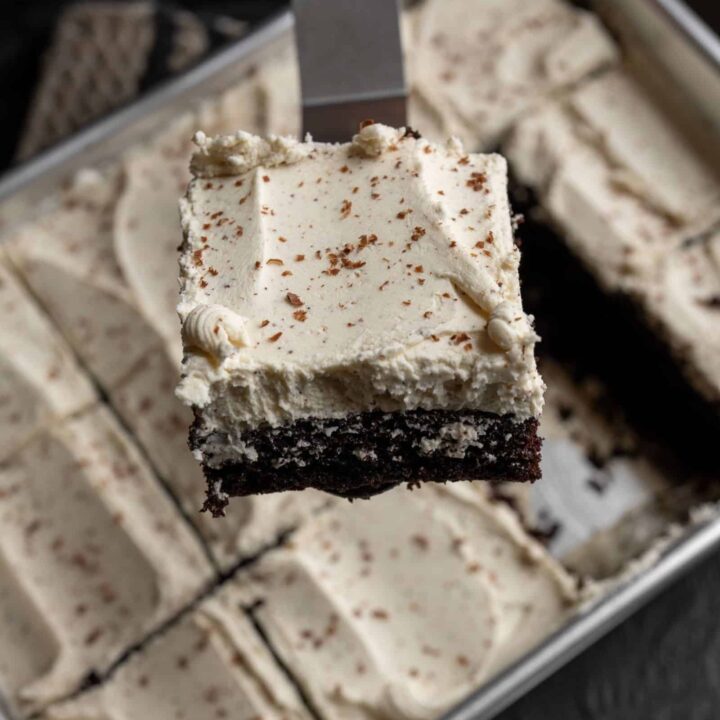
Dark Chocolate Espresso Cake with Brown Butter Frosting
A single layer of rich, dark chocolate espresso cake, topped with brown butter buttercream frosting come together to create the most luxurious sheet cake.
Ingredients
For the Cake:
- 1 1/2 sticks (170) Unsalted Butter
- 3 double shots (6 oz) Espresso*
- 1/2 C (40g) Cocoa Powder
- 1 (3.5 oz) Ghirardelli 72% Cacao Dark Chocolate Bar, roughly chopped
- 1 1/4 C (240g) Light Brown Sugar
- 1/2 Tbsp Bourbon Vanilla Extract*
- 1/2 tsp Kosher Salt*
- 3 Large Eggs
- 2 Egg Yolks
- 1 C (120g) All Purpose Flour
- 1/2 Tbsp Baking Soda
For the Brown Butter Frosting:
- 2 sticks (226g) Unsalted Butter
- 4 C (450g) Powdered Sugar
- 1 tsp Bourbon Vanilla Extract*
- 1/2 tsp Kosher Salt
- 3 Tbsp (45ml) Heavy Cream, cold*
Instructions
Making the Dark Chocolate Espresso Cake:
- Preheat the oven to 350ºF. Prep a 9x13 baking dish by greasing the sides and the bottom of the dish. Parchment paper is not necessary, since the cake will stay in the dish.
- In a small saucepan over low-medium heat, melt unsalted butter and espresso together. Once the butter is completely melted, remove from the heat.
- Immediately add the cocoa powder and chopped chocolate to the saucepan. The residual heat will melt the chopped chocolate. Stir together until the chocolate is completely melted. There may be small lumps of cocoa powder still, but they will mix into the batter at the next stage.
- In a large bowl, add the dark brown sugar, salt, and vanilla.
- Add the chocolate mixture to the large mixing bowl and whisk everything together until a smooth batter forms.
- Add the eggs and egg yolks and whisk until the batter is glossy and smooth.
- Add the flour and baking soda. Whisk until smooth.
- Pour the batter into the prepared baking dish. Bake for 22-25 minutes, or until a toothpick inserted comes out clean.
- Cool the cake completely before frosting.
Making the Brown Butter Frosting:
- While the cake is baking, start making the brown butter. In a large saucepan over low-medium heat, melt the butter, stirring constantly and scraping the bottom of the pan with a spatula.
- The butter will start to bubble before a layer of foam forms on top of the melted butter. Brown particles will appear on the bottom of the pan, under the layer of foam. Once the butter gives off a nutty aroma and there are lots of brown particles (you're looking for a nice amber color), remove from the heat.
- Transfer the browned butter to a heatproof bowl, and allow it to cool completely before using.
- In a stand mixer, using the whisk attachment, mix the cooled brown butter and powdered sugar together on low speed for the first thirty seconds. Increase the speed and whisk until the fully combined and smooth. Be sure to scrape down the side and bottom of the bowl about halfway through.
- Add the vanilla, kosher salt, and heavy cream. Whisk until fully combined.
- Spread the frosting evenly across the cooled cake and enjoy!
Notes
- If you don't have an espresso machine, you can use 6oz of freshly brewed coffee instead.
- Regular vanilla extract can be used in place of the bourbon vanilla extract.
- If you are using table salt instead of kosher salt, use half of the amount stated in the recipe.
- If you don't have heavy cream on hand, you can use milk instead.
- If your frosting is too thick, add more heavy cream. If it is too thin, add more powdered sugar.
Nutrition Information:
Yield: 15 slices Serving Size: 1 sliceAmount Per Serving: Calories: 480Total Fat: 26gCarbohydrates: 59gProtein: 4g
Sandy
Saturday 24th of January 2026
We are in the path of the snow event of the year. Yesterday as my husband and I were discussing our readiness, he suggested having a chocolate cake on hand. I love anything brown butter and found your recipe. This morning he asked when he could expect “his” chocolate cake. He said he would love to have it around 2. Well it is noon and we just had our first piece. Wow! Might be the best chocolate cake that I have ever made! I use Callebaut chocolate in my baking and didn’t have any bourbon vanilla (but I use Mexican vanilla). Otherwise, I followed the recipe to the letter. Very very good!!
Kate
Saturday 8th of March 2025
Thank you for sharing this recipe! I made it last night to share with a friend and we both really loved the flavor combination. It's lovely as a slice of cake, and I made some rolled cake balls with it as well and liked the flavors condensed together too.