
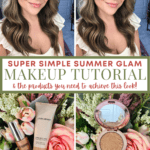
Summer is here! Which means it’s time to level up your makeup game to match the weather. Here in the Texas heat, it is impossible to rock a full face of makeup without sweating it completely off. So, I have created a lightweight and bronzy look to get you through the rising temperatures.
My main goal when putting on makeup in the summer is lightweight coverage and quick application. I tend to be pretty active in the summer between my workouts, activities and festivities. Which means, I need a makeup routine that can stay with me through it all or be applied quickly in between.
Luckily, I have been tweaking my minimal glam routine to perfection. And now, I have the ultimate Simple Summer Glam Makeup Tutorial for you girls! Check it out down below.
Our posts may contain affiliate links. As an Amazon Associate, we earn from qualified sales. Click here to read our full disclosure.
Simple Glam Walkthrough
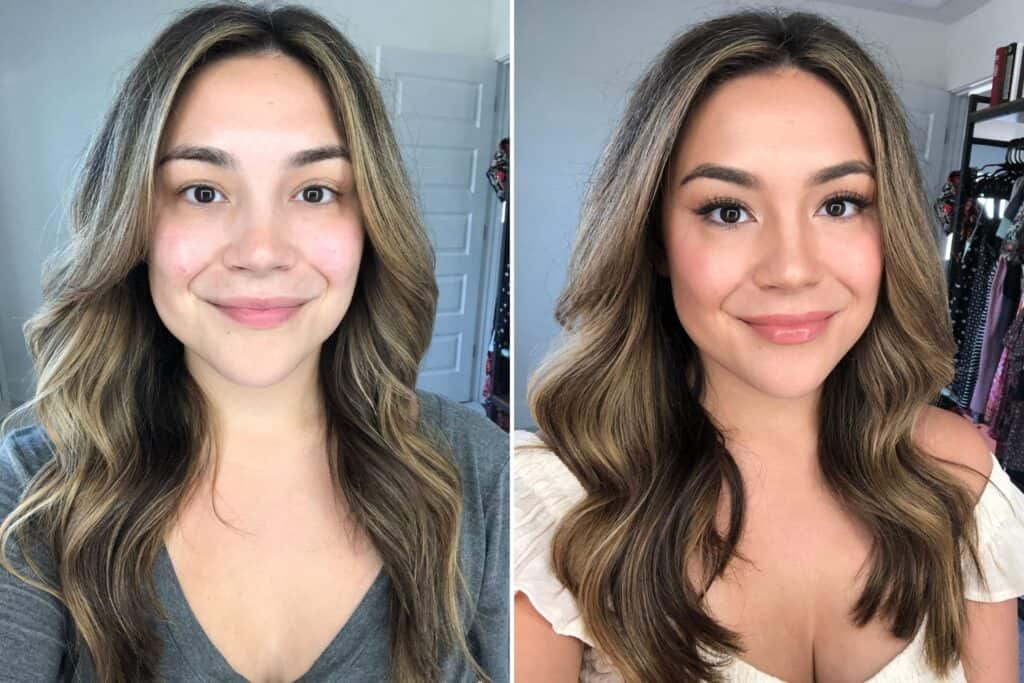
I am going to walk you through how to achieve this simple and glowing makeup look, step by step. I’ve included what products I use and how they look at each step on my face. It may look like a lot of steps, but I made sure to break everything into easy directions to avoid any confusion during application.
Any of these products are interchangeable or can be left out, if you want to! That’s the beauty of makeup. You can make anything work to suit what works best for you. I might like a little more glowing bronzer than you, so just add less or none at all. Or add more layers of the foundation for a fuller coverage. You do you, girl!
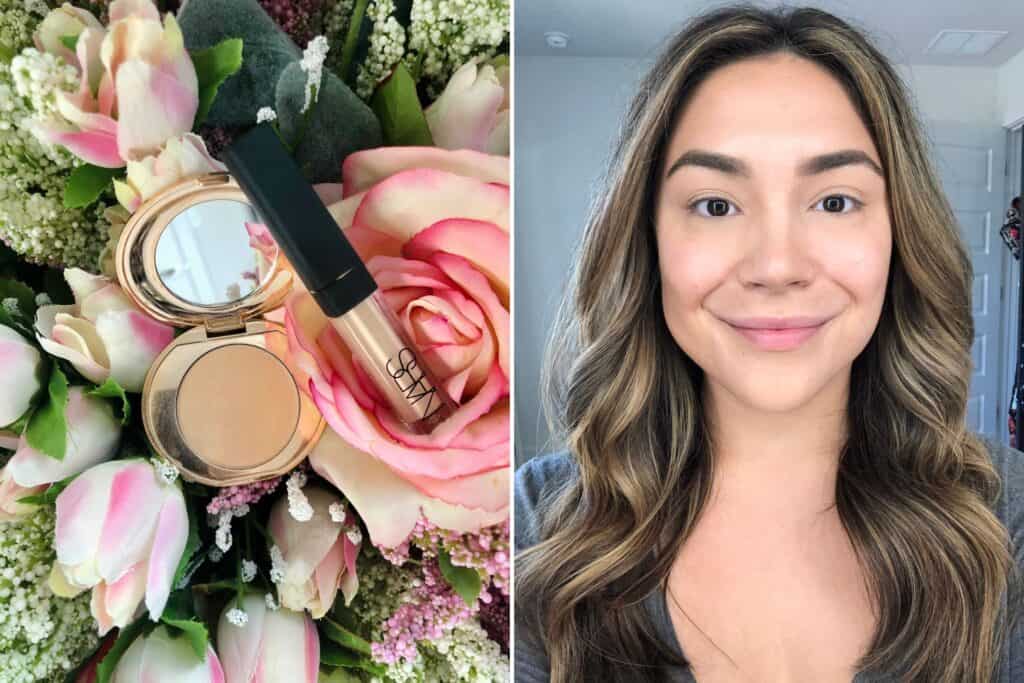
Step 1: Blend Laura Mercier Tinted Moisturizer and By Terry CC Serum in the shade ‘Sunny Flash’ together. Apply all over face and neck.

I typically use a pea-sized amount of the Laura Mercier Tinted Foundation, in the shade ‘Sand 3N1’, and mix it with three pumps of the By Terry CC Serum. I apply the mixed products with my fingers and blend out any extra product with a beauty blender.
If you like more coverage, you can build as many layers as you like. Both products are sheer and are meant to be layered. However, if you plan to do this, I would encourage using less pumps of the By Terry CC Serum in each layer to avoid looking overly bronzed and orange.
Step 2: Apply NARS Radiant Creamy Concealer to the under eye area, before setting with Charlotte Tillbury Airbrush Flawless Finish Setting Powder.
Since this is a lightweight and minimal makeup look, I only apply a small amount of the NARS Radiant Creamy Concealer, in the shade ‘Nougatine.’ I always use a beauty blender to blend in the concealer, before lightly setting the concealer with the Charlotte Tillbury Airbrush Flawless Finish Setting Powder, in the shade ‘Medium.’
I do my best to avoid using too much product to set the concealer, to prevent the under eyes from looking too powdery. The goal here is to look like we’re glowing!
Step 3: Fill in the brows with the IT Cosmetics Brow Power Universal Eyebrow Pencil.
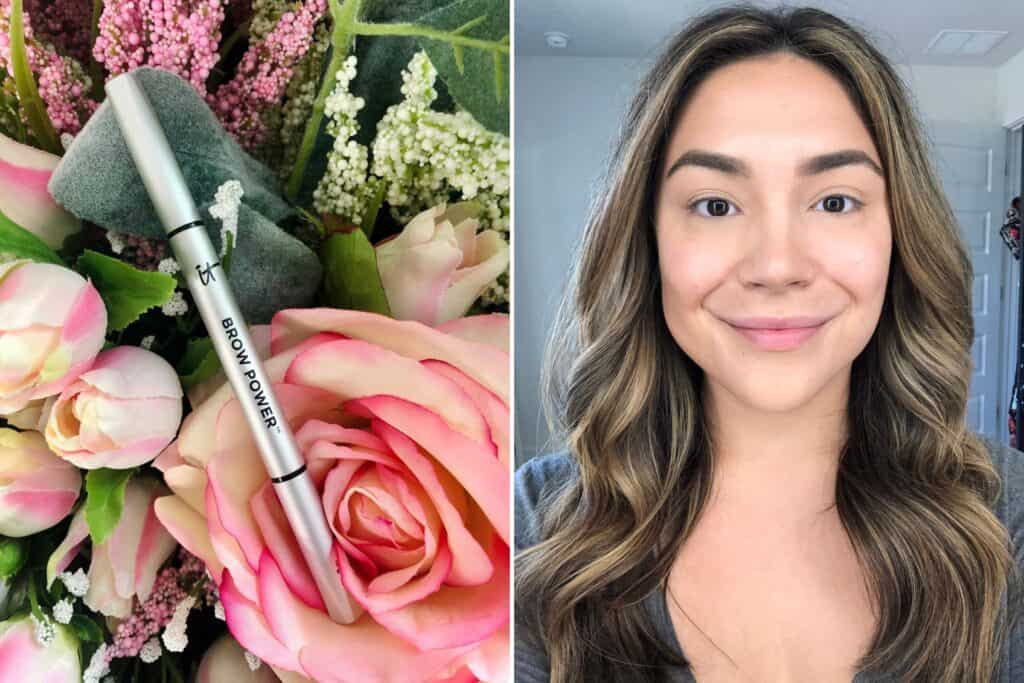
I use the IT Cosmetics Brow Power Universal Eyebrow Pencil in the shade ‘Universal Taupe’ to lightly fill in my brows. I love the precision that this pencil provides, as well as, the spooley brush on the other side!
Step 4: Apply Benefit Cosmetics Hoola Matte Bronzer the the cheekbones, nose, forehead, and the crease of the eyelid.
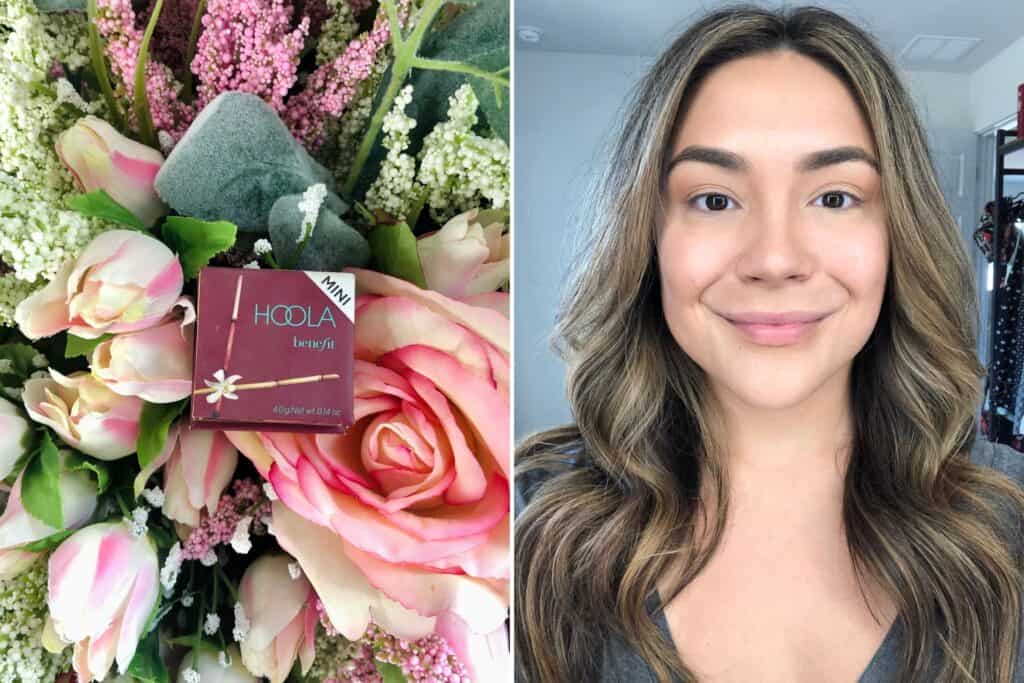
For this look, I use the Benefit Cosmetics Hoola Matte Bronzer in the shade ‘Natural Bronze’ for my summer bronzer. I apply the bronzer with the brush that it comes with, but buff out the product with a separate and clean Sigma F80 Kabuki brush.
I apply bronzer in all of the usual places – cheeks, nose, and forehead. But, I also apply my bronzer in the crease of my eyelid. Since I want to keep this makeup routine simple, I skip eyeshadow all together. (Related: My top tips for blending eyeshadow.)
Applying bronzer in the crease of the eyelid, helps create more dimension and brings the eyes in with the rest of the face. It would look obvious and plain with nothing applied to the eyelids!
Small tip: I would advise using less product and building up of you want a more bronzed look. It’s easier to build up bronzer than it is blending out too much bronzer.
Step 5: Apply Patrick Ta Monochrome Moment Velvet Blush and Becca Shimmering Skin Perfector Pressed Highlighter.
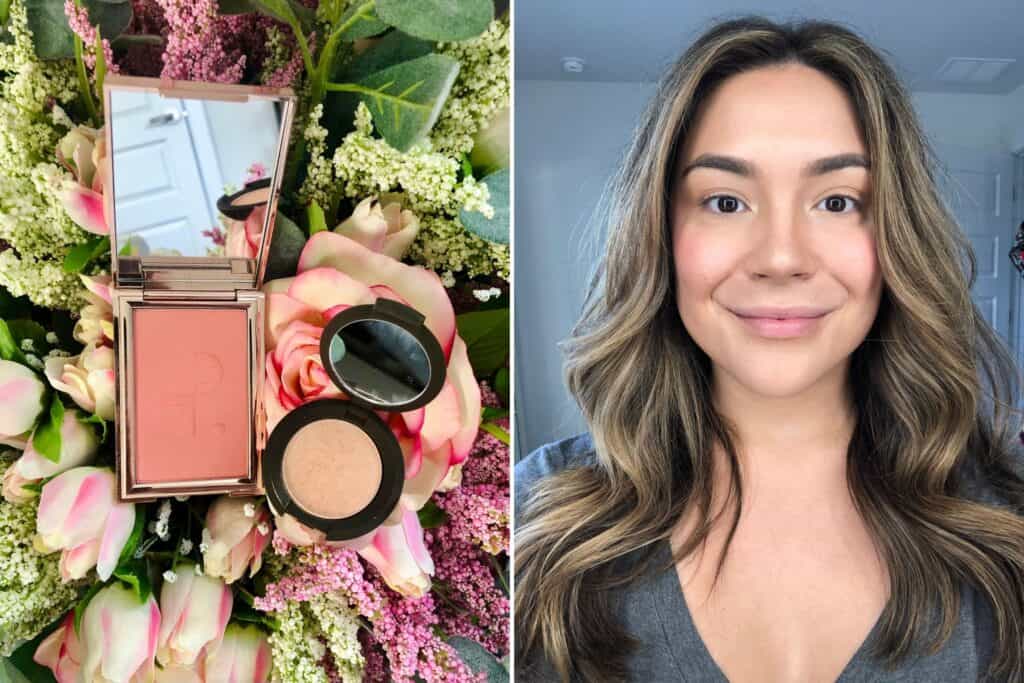
I would say that blush, highlighter, and bronzer are what make a summer look! So, don’t be shy when applying these products.
For this look, I applied Patrick Ta Monochrome Moment Velvet Blush in the shade ‘She’s Passionate’ to my upper cheeks. I did not apply the blush to the roundest part of my cheeks, but instead to my upper cheeks to create a lifting effect.
I applied the Becca Cosmetics Highlighter in the shade ‘Champagne Pop’ to my cheekbones, nose, upper lip, brow bone, and tear duct. Applying the product in all of these places creates a subtle but noticeable glow across the face.
To make the products sit more cohesively on the face, I used a Sigma F30 Large Powder Brush to buff out and blend all of the products together. My technique to blend the products together, is to run the brush across my whole face until there are no harsh lines from any of the products. This helps create a seamless finish for your makeup.
Step 6: Apply By Terry Brightening CC Powder in the shade ‘Sunny Flash’ to the cheeks, nose, forehead, and eyelids.
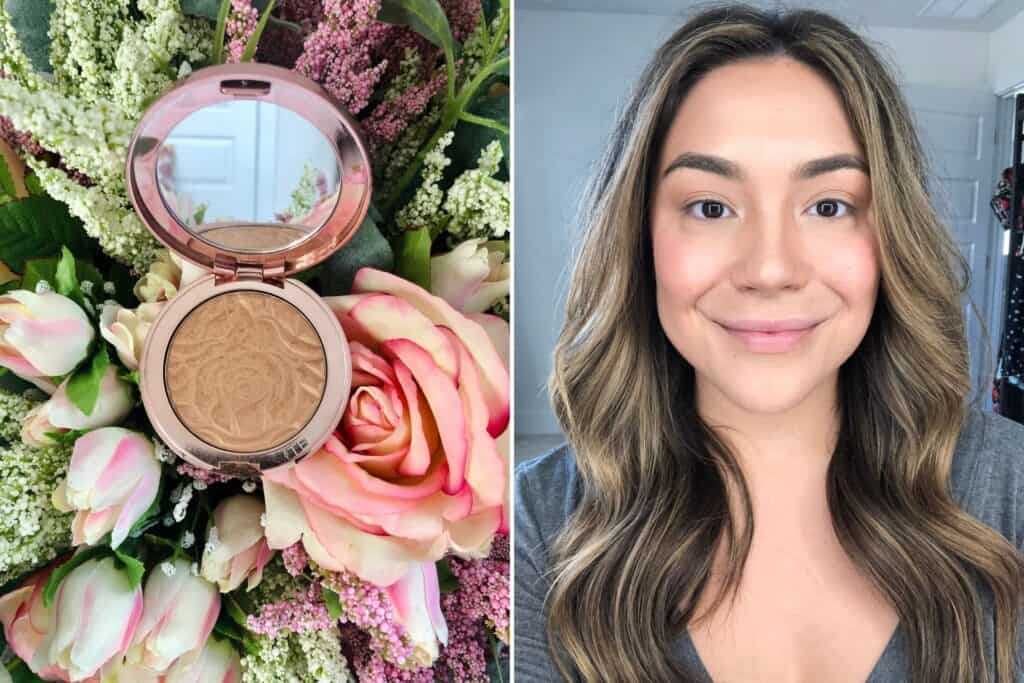
The last step for the face portion of this tutorial, is the application of the By Terry Brightening CC Powder in the shade ‘Sunny Flash.’ This step is optional, so if you’re not wanting a bronzed look you can definitely skip this!
I apply this CC Powder everywhere that I applied the bronzer a few steps ago. The formula of this product is more sheer than the first bronzer and has an illuminating (aka glittery) feature. By applying a thin layer of this over the bronzer, it creates a warmer and sparklier coverage for your face.
Once the CC Powder has been applied, go back over the entire face with the Sigma F30 Large Powder Brush to blend in the product. This gets rid of any potential harsh lines of the new product applied.
Step 7: Apply Maybelline Eye Studio Lasting Drama Gel Eyeliner to the upper lash-line.
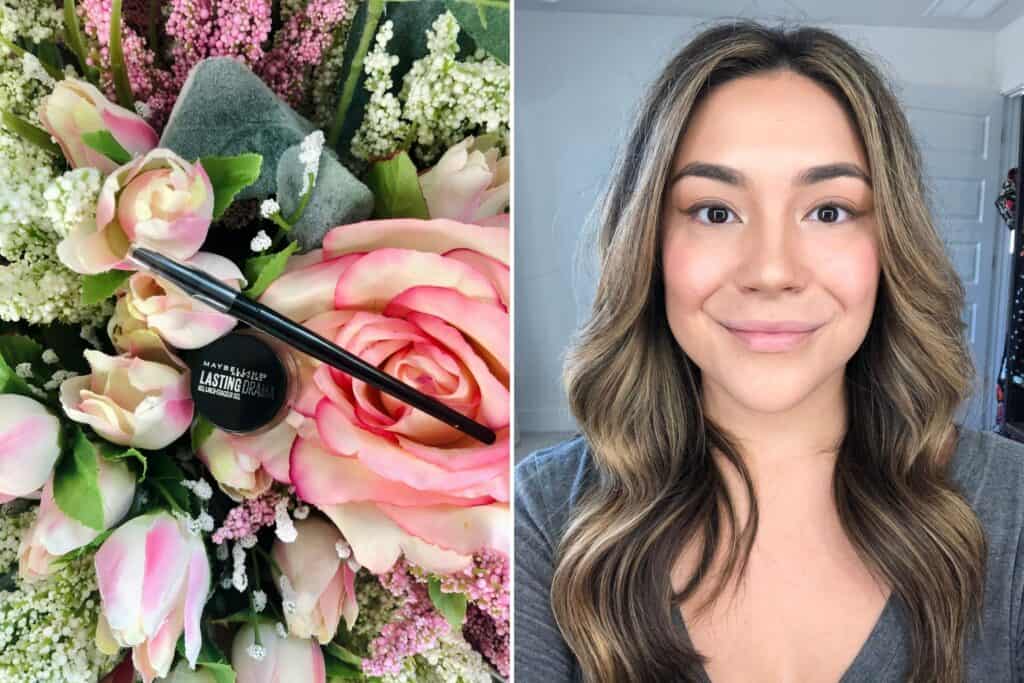
While I have always used black eyeliner, I have recently been drawn to brown eyeliner. It creates a much softer line that goes much better with a minimal makeup look. Since I have used the Maybelline Gel Eyeliner in black for years, I got it in brown and love it!
I apply the brown gel liner across my lash-line and with a small wing on the end. Then, I will take an eyeshadow brush and gently smudge it out to create a slight smokey effect. If I want it to look slightly bolder, I might also use brown eyeshadow to smudge it out. However, in the pictures of this post I did not use any brown eyeshadow.
Step 8: Apply IT Cosmetics Superhero Mascara and Ardell Lash Demi Wispies.
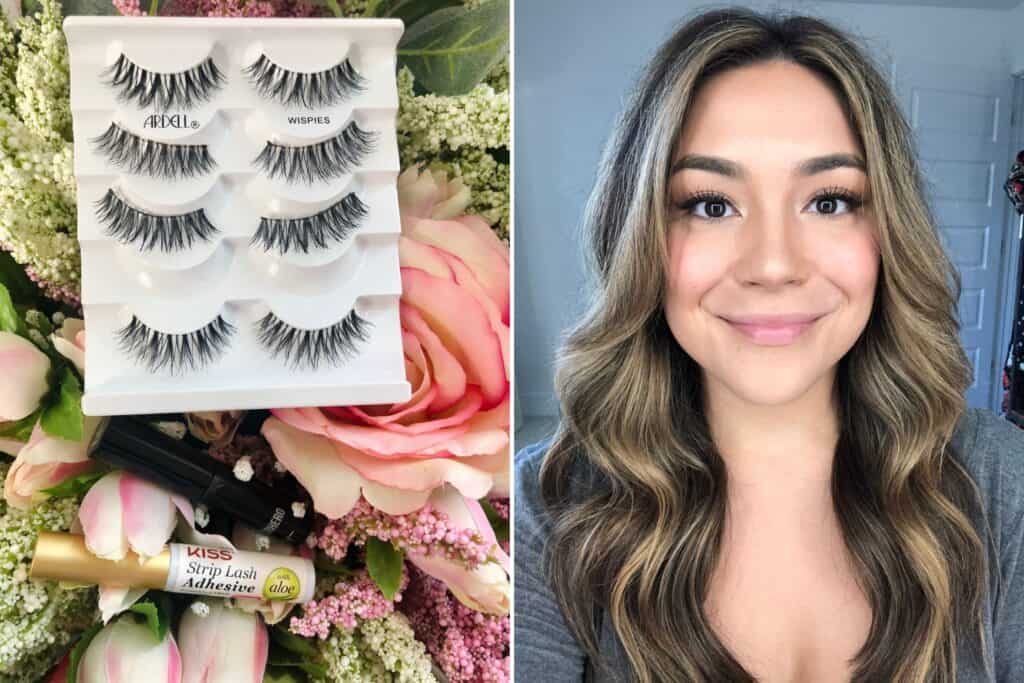
I always apply my mascara to my bottom lashes first. This prevents any smudging onto my eyelids from my eyelashes on the top while they dry. Then, I follow up the mascara on the bottom lashes with a light layer of mascara on my top lashes. Applying a thin layer of mascara before the false lashes, creates a better foundation and shape for the false lashes to grab onto.
Next, I apply my false lashes with the Kiss Strip Lash Adhesive. This step is totally optional. Since this is a minimal makeup tutorial, you can definitely get away with no false lashes. Personally, I love the way that they look and the added layer of drama they provide. I also find that I wear less mascara on my real lashes when I use false lashes, which makes makeup removal much easier!
Step 9: Apply e.l.f. Ride or Die Lip Balm in the shade ‘Tough Cookie’ to finish the look.
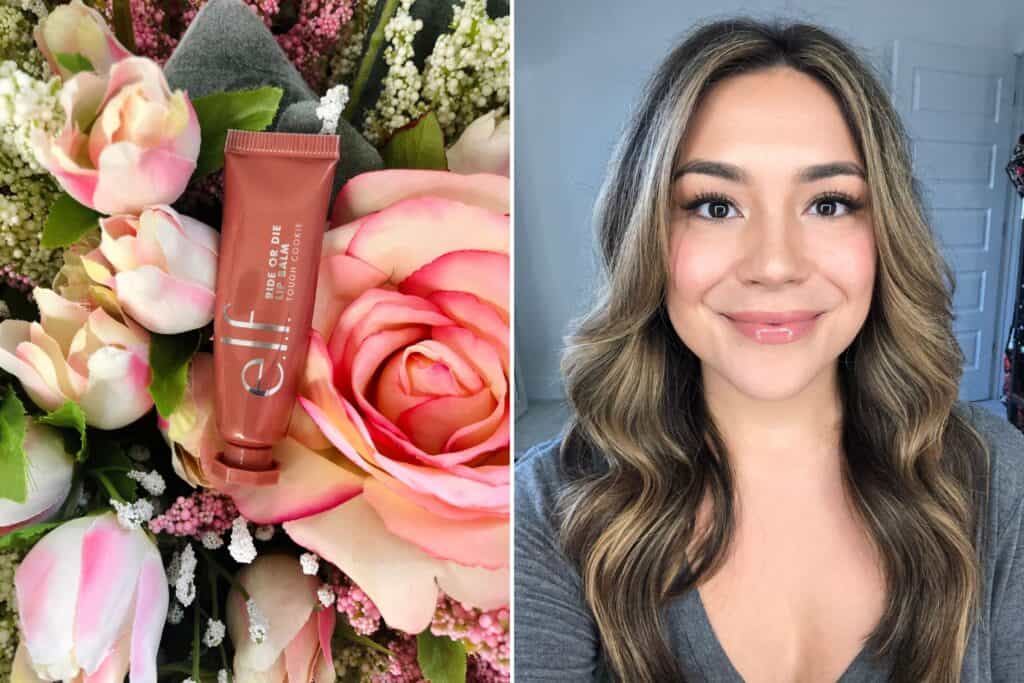
Okay, we’re almost done! Before applying the e.l.f. lip balm in the shade ‘Tough Cookie,’ generously spray your entire face with the Mac Prep + Prime Fix It Spray. Be sure that the bottle is at least 6-12 inches from your face, so it’s more if a gentle mist instead of direct spray.
According to Mac this product is “a lightweight water mist that gently soothes and refreshes skin and finishes makeup.” I find that it kind of melts my makeup together to create a super seamless and cohesive look. It also gives new life to makeup that’s been on for a few hours.
Typically, I will go over my entire face with the Sigma F30 brush one more time to blend everything together. Just make sure that the spray has completely dried before doing this! Then, apply the lip balm to finish off the look.
And that is it! There is my Simple Summer Makeup Tutorial for you girls. I hope this post taught you a new technique or exposed you to some awesome new products. If you have any questions or even some recommendations for a poppin’ summer glam, let me know in the comments below.
Robin Horst
Sunday 28th of August 2022
So helpful Vanessa. I follow you guys on IG and your make up is always beautiful. I'm older and can never find helpful make up tutorials. Keep making yours...maybe do one on your mom for us older ladies who still look pretty good.