
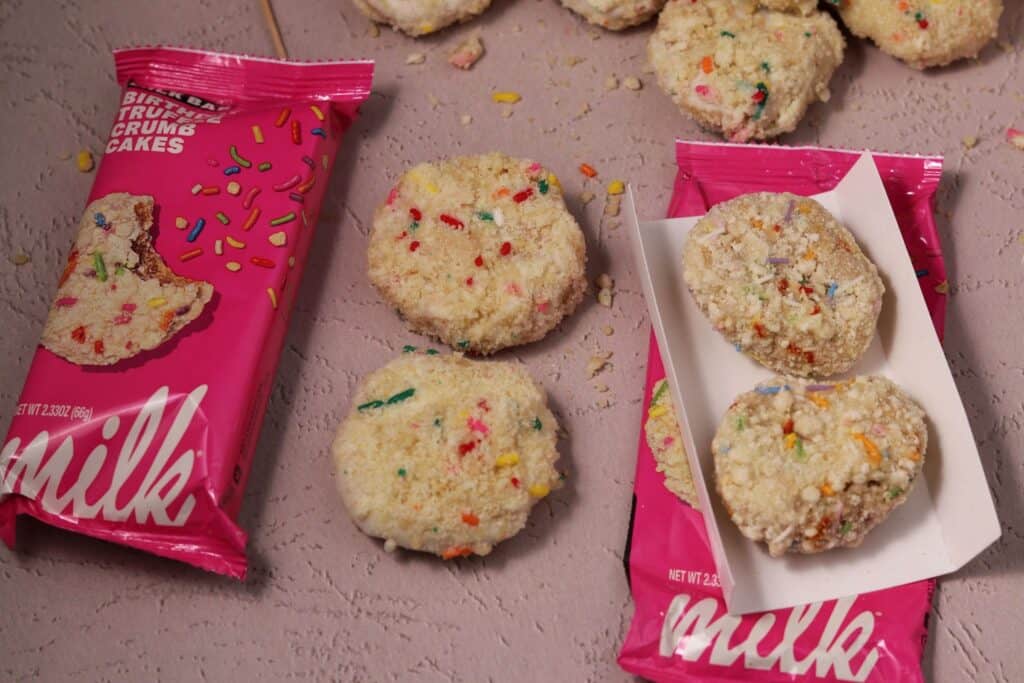
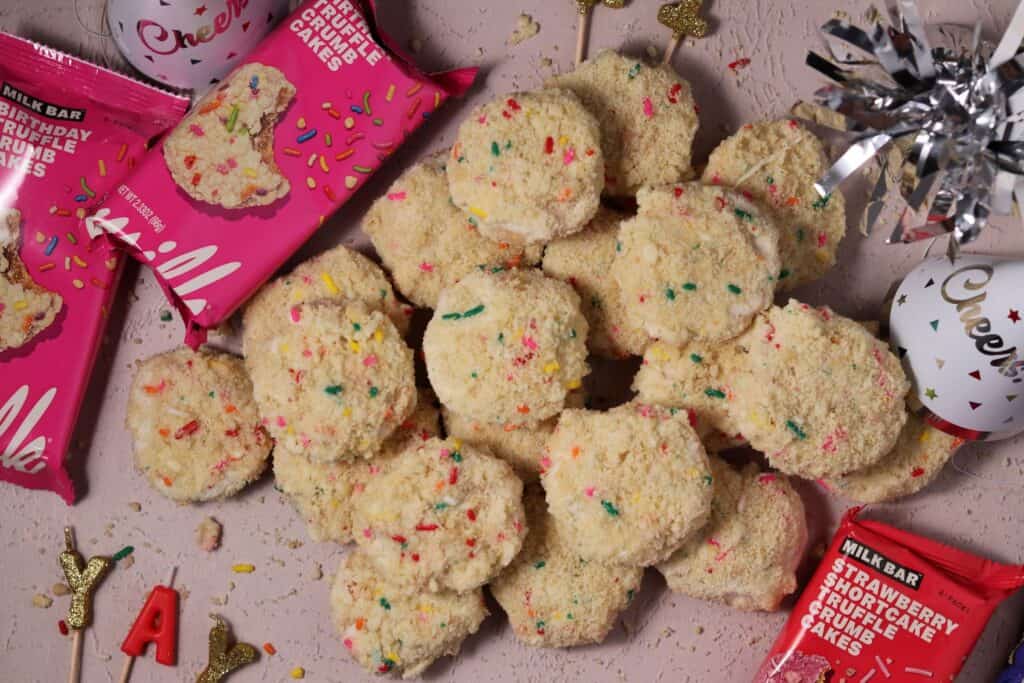
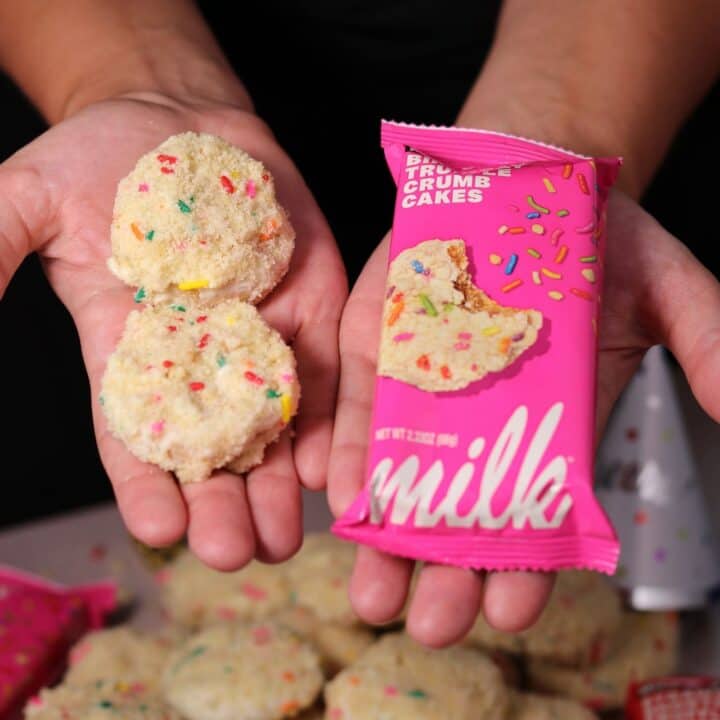
If you love the iconic Milk Bar Birthday Cake, then you’re going to love this copycat recipe for homemade Milk Bar Birthday Truffle Crumb Cakes! They are a bite-sized version of the original cake and a unique treat. My husband and I first discovered these at Target and were inspired to make our own after taking the Christina Tosi’s Creative Baking class.
While this is in no way an original recipe to our blog, it is a guideline on how to achieve these tasty treats at home. The Milk Bar Birthday Cake recipe can be found in numerous places online, and Christina’s made similar cake pops on shows like Netflix’s The Chef Show. But I wanted to create this blog post as a resource for those of you who want to make these at home.
Homemade Milk Bar Birthday Truffle Crumb Cakes Recipe Walkthrough
To make the Crumb Cakes, you will follow the Birthday Cake recipe as normal all the way up until assembly. I won’t go so far as to say that this is easier to make and assemble than the cake, but I do think it is a fun way to switch things up. This cake can be very sweet and is much more enjoyable bite-sized.
I will be upfront and say that no matter how you choose to make this recipe, it is VERY labor intensive and time consuming. You can break up the work over a few days if that’s easier. But, I promise that all of that effort it worth it! These crumb cakes are delicious.
If you’re looking for a simpler recipe to make, you might try one of our cupcake recipes. Our favorites are our Oreo Stuffed Cupcakes, Chocolate Cupcakes, Holiday Cupcakes, or our Red Velvet Cupcakes.
In this post I will walk you through how to achieve this bake and some possible alternatives, for those of you who are feeling creative. However, if you’re ready feel free to jump down to the recipe card for the step by step instructions.
Making the Cake Crumb
This portion of the recipe is probably the easiest and my favorite! The Cake Crumb is what really sets this dessert apart, in my opinion. It adds texture to each bite and is extremely delicious. While this portion of the recipe is actually used at the end of the assembly, I encourage you to make it first so that it has time to fully cool before coating the crumb cakes.
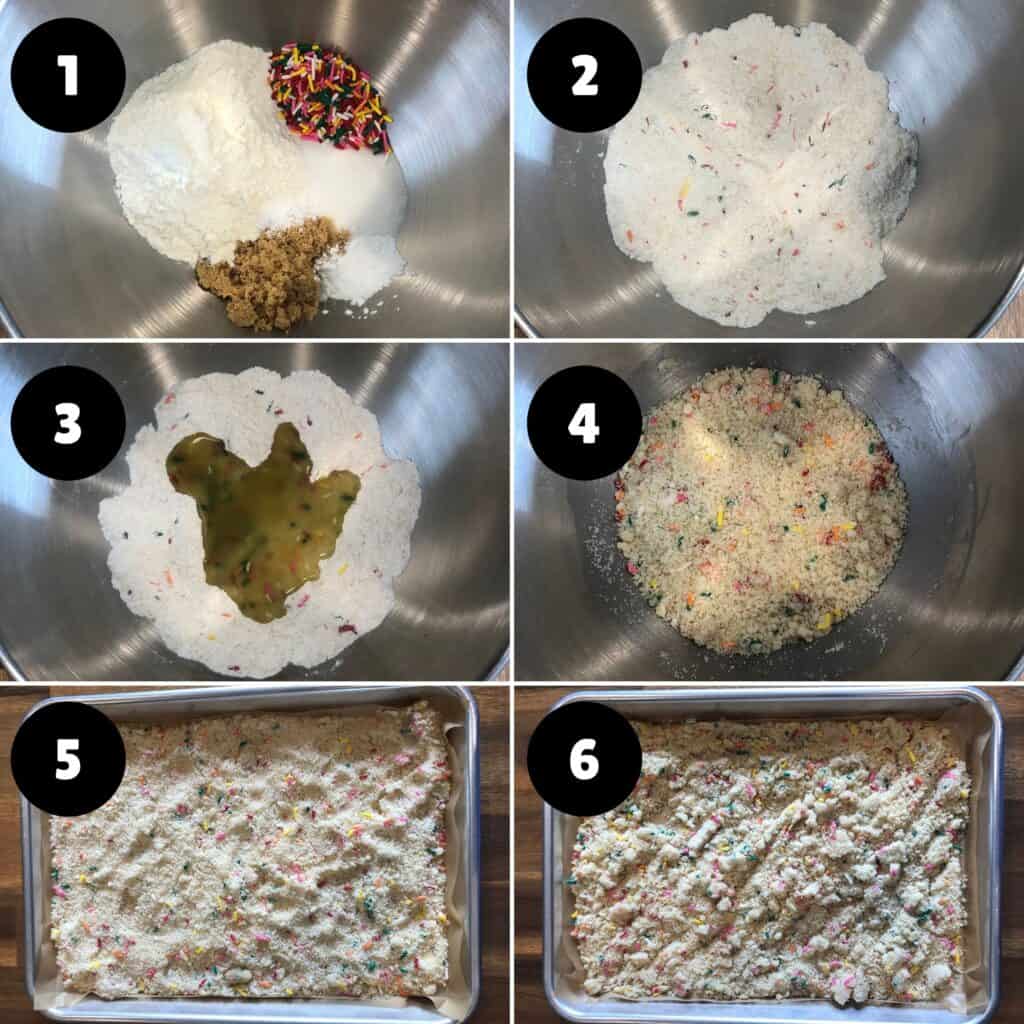
The cake crumb is actually a smaller version of the cake recipe, minus a few ingredients. When finished, it almost tastes like a sugar cookie. The main difference between the cake crumb for this version of the recipe and the original, is that you will want less large chunks in the cake crumb. This will allow a more sand-like consistency in the cake crumb and it will adhere to the white chocolate much better during assembly.
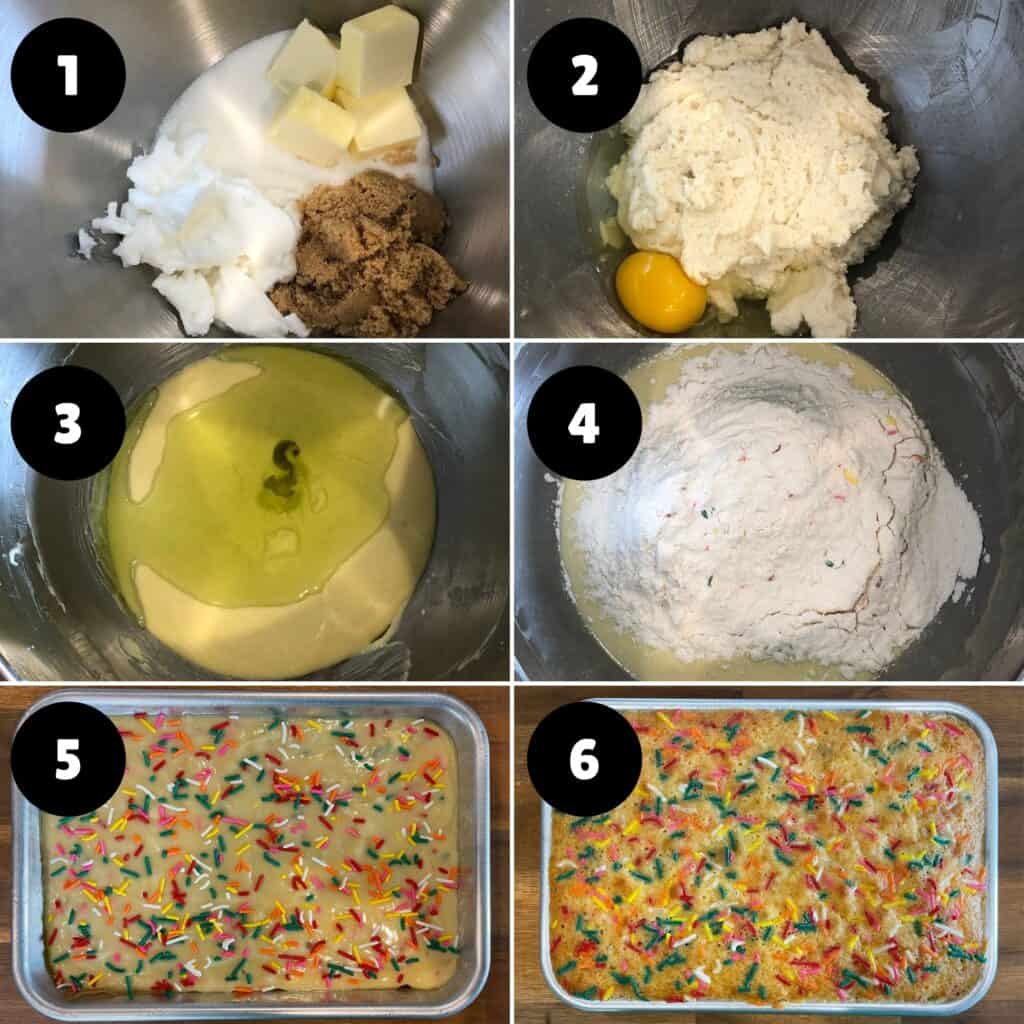
Making the Cake
This is the part of the recipe where I have made some modifications from the original recipe to accommodate converting it to truffle crumb cakes. The first step was to reduce the size of the cake being made to half of what the original recipe calls for. Instead of making the cake a quarter sheet pan, we have reduced the cake to fit into an eighth sheet pan.
Don’t have an eighth sheet pan? You could always double the cake to fit in your quarter sheet pan and use half. Or you could try using another cake pan with similar volume to an eighth sheet pan.
If you’re not feeling up to making this “fancier” cake, I imagine that you could swap it out with a regular confetti flavored cake mix out of the box. To make the cake fit this recipe’s requirements, you will want to half the recipe. While I doubt that the cake will be as good, it would be an easier method to achieve this bake.
Making the Frosting
Now, this is definitely one of the more complicated frosting recipes that I have made. It requires some unique ingredients that are quite sticky. However, the result is a fluffy white frosting that looks like it came straight out of a gourmet bakery.
While this frosting is very delicious and high end, I think I would prefer to make a simple cream cheese frosting instead. This recipe calls for glucose, corn syrup, and citric acid, which I find to be a little messy and annoying. Most people do not have these ingredients on hand, so a no frills cream cheese frosting would be a great substitution. My cream cheese frosting recipe would go perfectly with the rest of this recipe.
Assembling the Crumb Cakes
This portion of the recipe is the most labor intensive, messy, and time consuming. Anyone who has worked with melting chocolate will tell you that it’s a sticky process, but worth the results.
Once you have mixed the frosting together in a mixing bowl, form 30 crumb cakes. To get the correct shape, roll the batter into a small ball before gently pressing to flatten. The crumb cakes will be more if a cookie shape vs a cake ball. Now before you start coating, I would definitely recommend freezing the crumb cakes before assembly. This will prevent them from falling apart in the hot, melted chocolate.
You could also switch things up by making a chocolate version, if you’re feeling brave. We have tried several of the flavors offered like Chocolate Chip, Strawberry Shortcake, and Chocolate Pretzel. The cool thing about this recipe is you can swap out any or all flavors and really switch things up!
While I have not tested this theory, I have sourced some chocolate recipes to swap out. For the cake crumb, check out this post from Love and Olive Oil. For the cake, I would suggest my tried and true favorite chocolate cake from Stella Parks. As for the frosting, I think that my Cream Cheese Frosting recipe featured in my Devil’s Food Oreo Cupcakes post is a great option.
While it may be easier to swing by Target and grab a pack of crumb cakes, it definitely won’t be nearly as fun or rewarding as making them yourself. And if you choose to make these for a party or event, I promise you will WOW everyone with these babies. It is a big bake, but I think you’re up for the challenge. Let me know what you think in the comments below!
Homemade Milk Bar Birthday Truffle Crumb Cakes
A bite-sized version of the iconic Milk Bar Birthday Cake, made from the comfort of home.
Ingredients
For the Cake Crumb
- 1/2 C (100g) Granulated Sugar
- 1 1/2 Tbsp (25g) Brown Sugar
- 3/4 C (90g) Cake Flour
- 1/2 tsp (2g) Baking Powder
- 1/2 tsp (2g) Kosher Salt
- 2 Tbsp (20g) Rainbow Sprinkles
- 1/4 C (40g) Grapeseed Oil
- 1 Tbsp (12g) Clear Vanilla Extract
For the Cake
- 2 Tbsp (28g) Unsalted Butter, softened
- 2 1/2 Tbsp (30g) Vegetable Shortening
- 10 Tbsp (125g) Granulated Sugar
- 1 1/2 Tbsp (25g) Brown Sugar
- 2 Eggs
- 2 Tbsp + 2 tsp (32g) Grapeseed Oil
- 1/4 C (60g) Buttermilk
- 1 tsp (4g) Clear Vanilla Extract
- 1 C (120g) Cake Flour
- 3/4 tsp (1.5g) Baking Powder
- 1/2 tsp (1.5g) Kosher Salt
- 2 1/2 Tbsp (25g) Rainbow Sprinkles, for batter
- 1 Tbsp (15g) Rainbow Sprinkles, for sprinkling on cake
For the Frosting
- 2 Tbsp (28g) Unsalted Butter, softened
- 1 Tbsp (12g) Vegetable Shortening
- 1 Tbsp (15g) Cream Cheese, softened
- 3/4 tsp (6g) Glucose
- 3/4 tsp (4g) Light Corn Syrup
- 3/4 tsp (3g) Clear Vanilla Extract
- 1/3 C (50g) Confectioners' Sugar
- 1/8 tsp (.25g) Kosher Salt
- 1 pinch (.6g) Baking Powder
- 1 pinch (.6g) Citric Acid
For the White Chocolate Coating
- 10oz White Chocolate, melted
- 1 1/2 Tbsp (24g) Grapeseed Oil
Instructions
Making the Cake Crumb
- Preheat the oven to 300ºF (150ºC).
- Combine the sugars, cake flour, baking powder, salt, and rainbow sprinkles in the bowl of a stand mixer fitted with the paddle attachment, and mix on low speed until well combined.
- You can gauge when your ingredients are mixed based on the distribution of sprinkles throughout the mixture. - Combine the oil and vanilla in a small container or bowl and mix them together. Then with your mixer on low speed, stream the oil and vanilla in as close to the middle of the bowl as possible.
- The wet ingredients will act as glue to help the dry ingredients form small clusters, so continue paddling until these clusters appear. The largest crumbs should be no larger than a half-inch in diameter.
- Check the bottom of the bowl for any lingering dry ingredients and fold them in with a spatula. - Pour the crumb out onto a quarter sheet pan lined with parchment. Use your fingertips to spread the crumb out evenly.
- Bake for 20 minutes, then check to make sure they are browning very slightly. The crumbs should contract just a bit to form individual boulder shapes when they're done—if they haven't yet, leave them in the oven for another two or three minutes. If you have an oven thermometer, check to make sure that your oven is at the correct temperature.
- If you plan on baking your cake sponge immediately afterward, you can clean up your space and start preparing the sponge recipe as the crumb bakes. - Let the crumb cool completely before using in a recipe. Stored in an airtight container, the crumb will keep fresh for 1 week at room temperature or 1 month in the fridge or freezer.
Making the Cake
- Preheat the oven to 350°F (175°C).
- Combine the butter, shortening, and sugars in the bowl of a stand mixer fitted with the paddle attachment and cream together on medium-high for 2-3 minutes, just until it all comes together. Scrape down the sides of the bowl.
- Crack the eggs into a small container. Add the eggs to the mixture one at a time with your mixer on low speed, making sure each is fully incorporated before adding the next. After you add each egg, you can increase the speed to high for a few seconds to help the ingredients incorporate.
- Mix on high for 2-3 minutes. Scrape down the sides of the bowl once more, looking for any streaks of ingredients that haven't been incorporated.
- When it's done, the mixture should be light tan, glossy, and homogenous. If it looks like the ingredients are still distinct and trying to separate, cream for another 2-3 minutes. It's okay to see some sugar granules in the mixture. - On low speed, stream in the grapeseed oil toward the center of the bowl and then switch to high speed and paddle for 3-6 minutes until the mixture is practically white, twice the size of the original fluffy butter-and-sugar mixture, and completely homogenous.
- Turn down your mixer to low speed and stream in the buttermilk and vanilla just a little at a time until fully incorporated.
- Combine the cake flour, baking powder, salt, and 25 g rainbow sprinkles in a medium container or bowl and mix with a spoon. Add the dry ingredients into your mixing bowl. On the lowest mixer speed, mix for 45 to 60 seconds, just until the dry ingredients are well distributed.
- Scrape down the sides and bottom of the bowl thoroughly to ensure the batter is fully mixed. If not, keep lightly working the batter with your spatula until any dry ingredients are fully incorporated. - Spray an eighth sheet pan with baking spray in an 'X', line it with parchment, and spray the top of the parchment and the sides of your pan.
- Pour the batter into the prepared eighth sheet pan and, using a spatula, knife, or the back of a spoon, spread the cake batter in an even layer.
- Sprinkle the remaining 15 g rainbow sprinkles evenly on top of the batter.
- Bake the cake for 30 minutes, checking intermittently for uneven browning. The cake will rise and puff, doubling in size.
- At 15 minutes, take a look at the cake with your oven light to see if any areas are browning more than others. If so, very gently rotate the cake in the oven (intense movement can cause your cake to deflate). For the next 15 minutes, you can check on the cake with the oven door
closed every 5-10 minutes and rotate if you see uneven browning.
- If you notice the cake is getting too much color on top but isn't set in the center yet, you can reduce the oven temperature to 325°F until the cake is baked through.
- At 30 minutes, use your finger to gently poke around the outside and center of the cake. It should bounce back very slightly and not be jiggly at all. Leave the cake in the oven for an extra 3-5 minutes if it doesn’t pass these tests. - When baked through, remove the cake from the oven and allow to cool to room temperature. The cooled cake can be stored in the fridge wrapped in plastic wrap for up to 5 days.
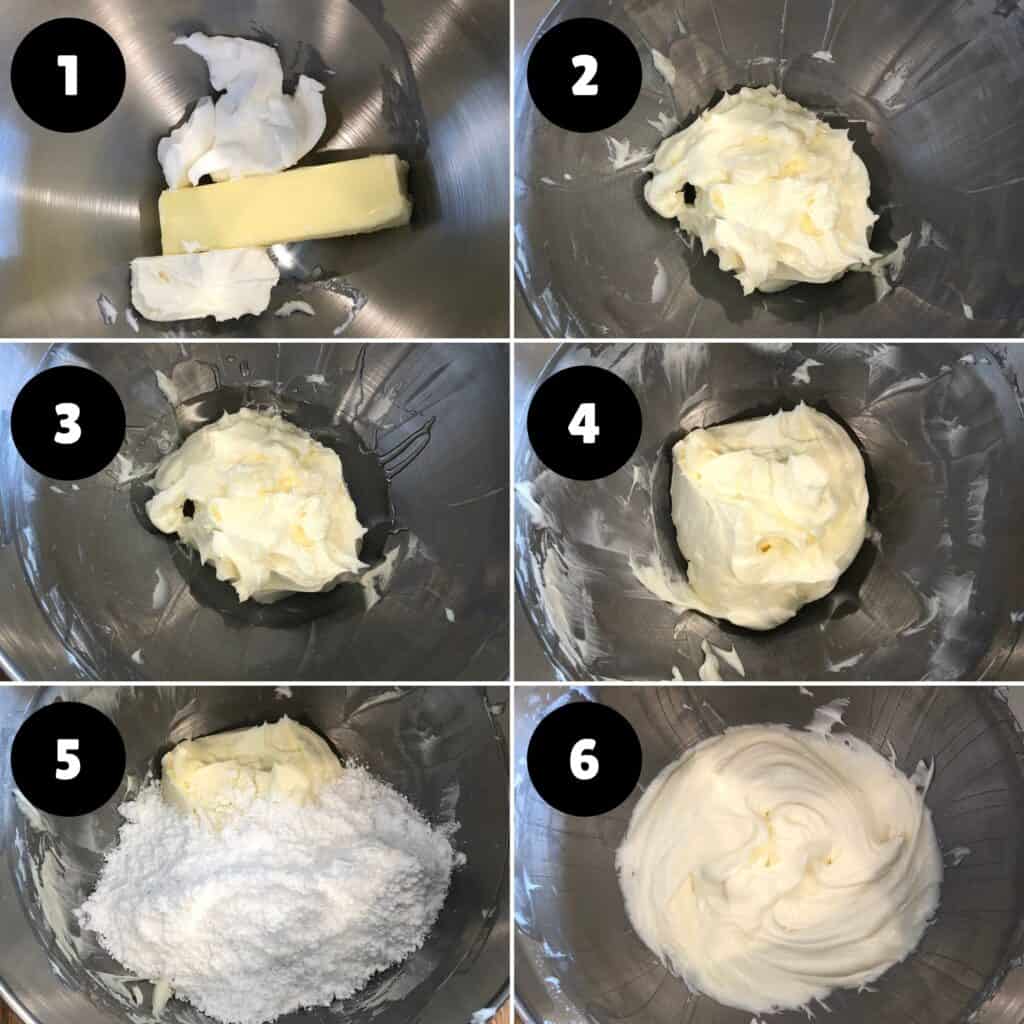
Making the Frosting
- Combine the butter, shortening, and cream cheese in the bowl of a stand mixer fitted with the paddle attachment and cream together on high for 2-3 minutes until the mixture is smooth and fluffy. Scrape down the sides of the bowl.
- Add the glucose, corn syrup, and clear vanilla extract and paddle on low speed until fully incorporated. Crank the mixer up to high and beat for about a minute until the mixture is silky smooth, glossy, and white. Scrape down the sides of the bowl.
- Pro Tip: Spray a spoon and small container with cooking spray to help measure your glucose so it doesn't stick too much. - Combine the confectioners’ sugar, salt, baking powder, and citric acid in a container or bowl and add to the stand mixer bowl. Start on low, then crank the speed up to high and mix for 3 minutes or until you have a stark white, beautifully smooth and fluffy frosting. It should look just like it came out of a plastic tub at the grocery store!
- Use the frosting immediately, or store it in an airtight container in the fridge for up to 1 week.
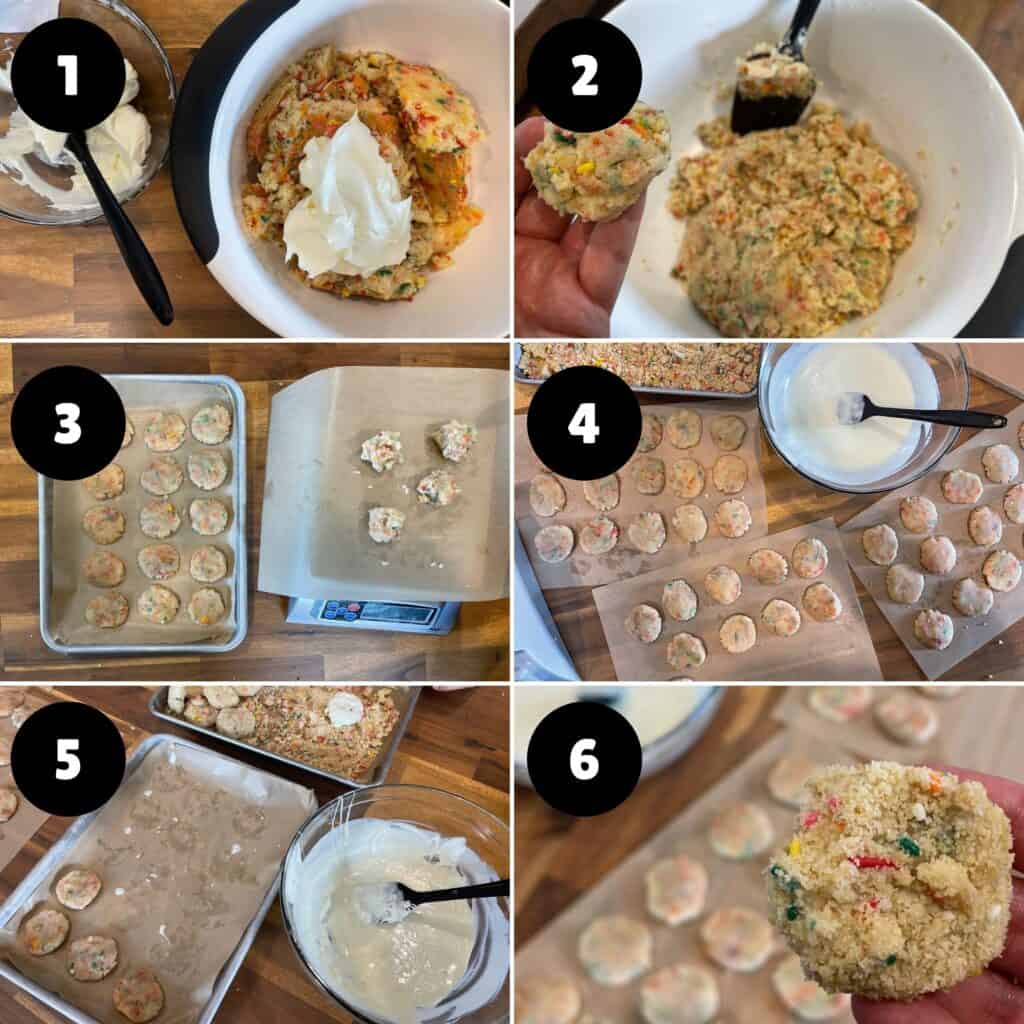
Assembling the Truffle Crumb Cakes
- In a large mixing bowl, gently mix the cake and frosting together until a batter forms. Do not over mix the two ingredients together.
- Form the batter into small balls, about 18 grams each, to make 30 total. Flattening the balls of dough creates a more cookie like shape versus a cake ball if it was left round.
- Freeze the portioned out batter for about 30 minutes. This will help prevent the batter from falling apart when dipped into the melted chocolate.
- Melt the chocolate in the microwave. Add the grapeseed oil and stir until it has fully incorporated.
- Dip the cakes into the white chocolate until completely covered, before quickly tossing to coat with the cake crumb. Be sure to move fast, as the chocolate will set very quickly.
- Store the crumb cakes in the fridge or freezer and enjoy!
Nutrition Information:
Yield: 30 Crumb Cakes Serving Size: 1 Crumb CakeAmount Per Serving: Calories: 196Total Fat: 11gCarbohydrates: 23gProtein: 1.5g
Nataliya
Friday 20th of August 2021
These are identical in taste to the Milk Bar, my friends were impressed how delicious and easy they were to make!
Mason Woodruff
Thursday 26th of August 2021
Thanks, Nataliya! Lots of work but worth the effort, in our opinion.
Alyssa Hicks
Friday 20th of August 2021
I am a BIG fan of Milk Bar and I’ve made the birthday cake previously. I made these today and they were spot on! So delicious!! 😍 thank you!!!